Build your own ground-mounted solar panels and slash energy costs by up to 70% while maintaining full control over your installation’s placement and angle. British Columbia’s unique terrain and solar exposure patterns make DIY ground mounts an ideal choice for maximizing energy production year-round. Transform your backyard into a powerful energy hub using readily available materials like galvanized steel posts, concrete footings, and aluminum rails – all designed to withstand our coastal weather conditions and heavy snow loads. Unlike rooftop installations, ground mounts offer easy maintenance access and optimal positioning for capturing maximum sunlight during our shorter winter days, while simple adjustments help prevent snow accumulation. Local homeowners throughout BC have successfully installed their own systems, proving that with proper planning and basic construction skills, anyone can harness clean solar energy without professional installation costs.
Planning Your Ground Mount System
Site Selection and Solar Assessment
Selecting the right location for your ground-mounted solar system is crucial for maximizing energy production in British Columbia’s unique climate. Start by identifying a south-facing area on your property that receives consistent sunlight throughout the day. For optimal solar panel placement, avoid spots near tall trees, buildings, or other structures that could cast shadows on your panels.
Use a solar pathfinder or smartphone app to track sun exposure throughout different seasons. In BC, we recommend monitoring potential locations for at least one full day during summer and winter to account for seasonal variations in sun paths. The ideal spot should receive at least 6 hours of direct sunlight daily.
Consider ground conditions and accessibility. Look for level terrain or areas that can be easily leveled. Rocky or steep surfaces may require additional preparation work. Ensure the chosen location has well-draining soil to prevent water accumulation around your mount structure.
Distance from your home’s electrical panel is another important factor. While longer cable runs are possible, keeping the distance under 50 feet helps minimize power losses and reduces installation costs. Remember to check local building codes and setback requirements before finalizing your location.
Many BC homeowners find success by positioning their ground mounts in open backyard spaces or unused garden areas, allowing for easy maintenance access while maximizing solar gain throughout our region’s varying seasons.
Permits and Local Regulations
Before starting your ground-mounted solar panel project in British Columbia, it’s essential to understand and comply with local building codes and permit requirements. In most BC municipalities, you’ll need to obtain both a building permit and an electrical permit for your installation.
Contact your local municipality’s building department early in the planning process. They can provide specific guidelines for ground-mounted solar installations, including height restrictions, setback requirements, and structural specifications. Many BC communities have streamlined the permitting process for renewable energy projects, making it easier for homeowners to go solar.
For electrical work, Technical Safety BC oversees permit requirements. While you can perform some DIY installation work, a licensed electrical contractor must review and approve the final connections to ensure safety and code compliance.
Some key considerations include:
– Zoning bylaws and land use restrictions
– Property line setbacks (typically 5-10 feet)
– Maximum height allowances
– Environmental impact assessments (if required)
– Structural engineering requirements
– Grid connection approval from your utility provider
Remember that permit requirements can vary significantly between municipalities. For example, rural properties may have different regulations than urban areas. We recommend scheduling a pre-application meeting with your local building department to discuss your specific project and ensure you understand all requirements before beginning construction.
Materials and Tools Checklist
Before starting your DIY solar installation project, gather these essential materials and tools. Most items can be found at local hardware stores across British Columbia, such as Home Depot, Rona, or your neighborhood building supply store.
Primary Materials:
– Galvanized steel posts (2-3″ diameter)
– Schedule 40 steel pipes
– Concrete mix (available at Kent or Home Depot)
– Aluminum rails and mounting brackets
– Stainless steel bolts, nuts, and washers
– Ground screws or helical piles
– UV-resistant zip ties
– Grounding wire and lugs
– Weather-resistant junction boxes
Tools Required:
– Post hole digger or auger
– Level (2′ and 4′)
– Measuring tape
– Socket set and wrenches
– Power drill with masonry bits
– Hammer drill
– Angle grinder
– Shovel
– Wheelbarrow
– Safety equipment (gloves, safety glasses, steel-toe boots)
Local Sourcing Options:
Hardware and Building Supplies:
– Windsor Plywood (multiple BC locations)
– RONA (province-wide)
– Home Depot (major cities)
Solar-Specific Components:
– Canadian Solar Direct (Vancouver)
– Energy Solutions BC (Victoria)
– Terratek Energy (Kelowna)
For specialized solar mounting hardware, consider local suppliers like Vancouver Solar or Western Solar Systems, who often offer better prices than big-box stores and can provide expert advice. Many suppliers offer package deals that include all necessary mounting hardware, potentially saving you money on individual components.
Remember to check with your municipality’s building department for specific requirements regarding mounting systems and required materials for your area’s wind and snow loads.
Building Your Ground Mount Structure
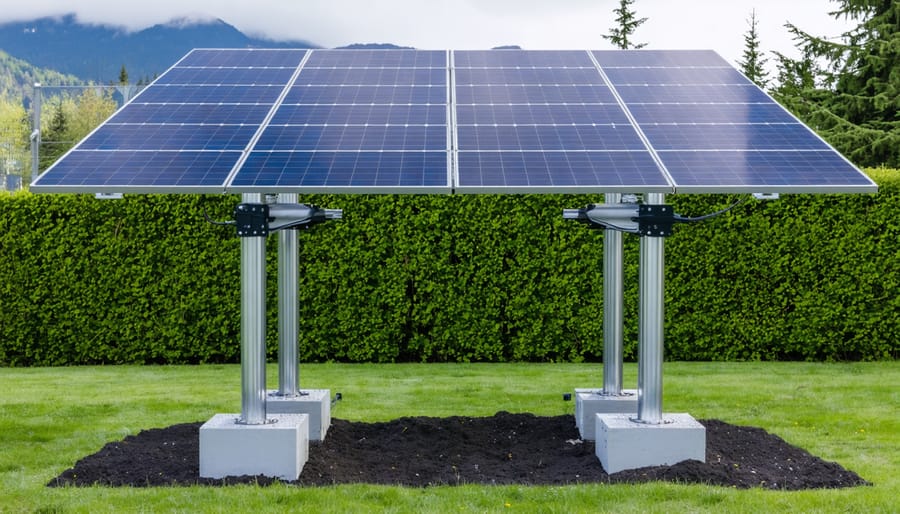
Foundation and Post Installation
A solid foundation is crucial for your ground-mounted solar system’s stability and longevity in British Columbia’s diverse terrain. Begin by marking your installation site and checking for underground utilities – this is a legal requirement in BC that you can arrange by calling BC 1 Call.
For most residential installations, concrete pier foundations work best, especially given our region’s freeze-thaw cycles. Start by digging holes at least 4 feet deep or below the frost line, whichever is deeper. Space the holes according to your mounting system’s specifications, typically 6-8 feet apart.
Pour concrete into sonotube forms placed in each hole. Before the concrete sets, insert J-bolts or mounting brackets that will later attach to your racking system. Use a level to ensure the bolts are perfectly vertical – this is critical for proper panel alignment. Allow the concrete to cure for at least 72 hours, though longer curing times are recommended during wet weather, which is common in BC.
For areas with loose or sandy soil, consider using additional concrete and wider holes. In rocky terrain, which is common in interior BC, you might need specialized equipment or alternative mounting solutions like ballasted systems.
After the concrete has fully cured, install your mounting posts. These should be galvanized steel to withstand our coastal climate and prevent rust. Secure the posts to your foundation using heavy-duty nuts and washers, ensuring they’re torqued to specification.
Use a laser level or string line to verify all posts are at the same height and perfectly aligned. Small adjustments can be made using shims if needed. This attention to detail during foundation work will prevent headaches during panel installation and ensure optimal system performance.
Remember to document your foundation work with photos and measurements – this may be required for permit inspections and will be valuable for future maintenance or system modifications.
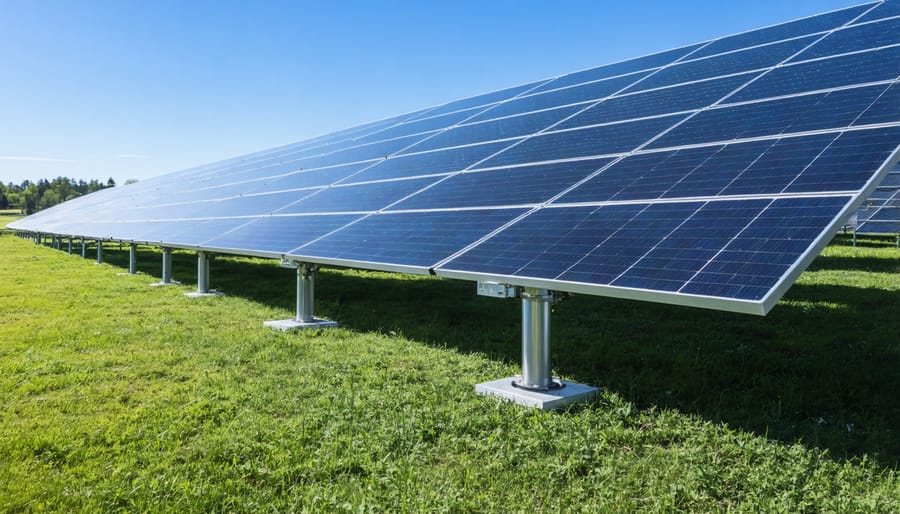
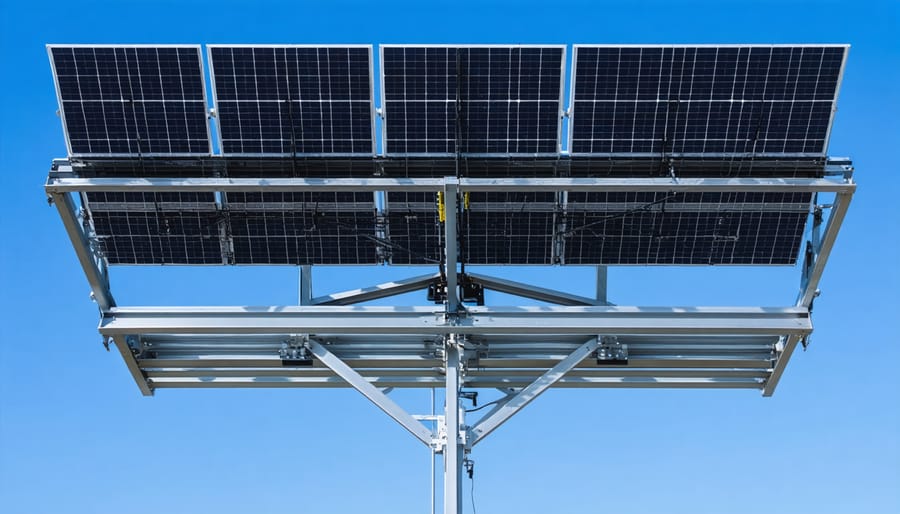
Frame Assembly and Mounting Rails
The foundation of a successful ground-mounted solar system lies in building a sturdy frame assembly and mounting rails. Begin by constructing a robust base frame using galvanized steel or aluminum C-channels, which offer excellent durability in BC’s varied climate conditions. These materials resist corrosion and can withstand our coastal weather patterns.
For optimal panel support, create a grid pattern with your main support beams spaced according to standard solar panel dimensions. Typically, you’ll want to space your vertical posts 2-3 meters apart, depending on your soil conditions and local wind load requirements. In areas with heavy snowfall, like the Interior regions, consider adding additional support points.
When installing the mounting rails, ensure they run parallel to each other and are perfectly level. Use a laser level or string line to maintain accuracy across the entire structure. The rails should be secured to the frame using appropriate brackets and stainless steel hardware. For areas experiencing significant temperature fluctuations, include expansion joints every 12 meters to allow for thermal movement.
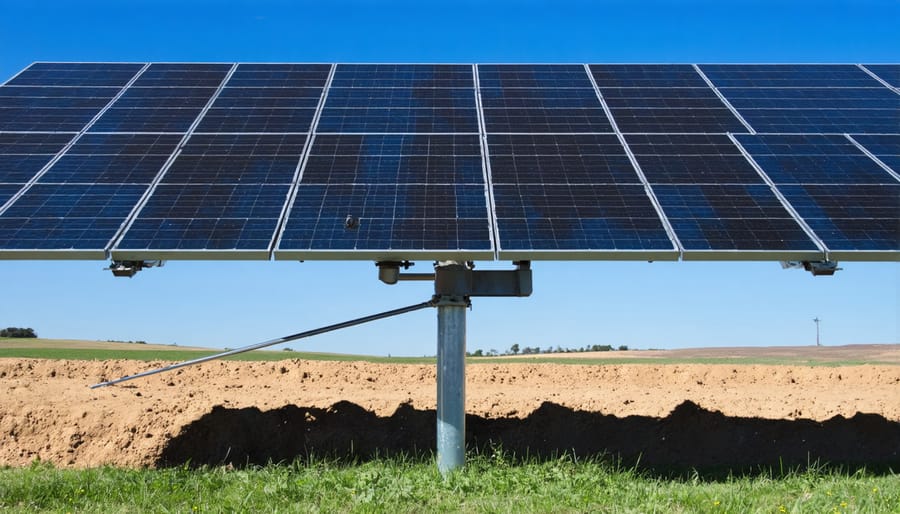
Cross-bracing is essential for stability, particularly in regions prone to high winds or seismic activity. Install diagonal supports at regular intervals, focusing on corner sections where structural forces are greatest. Use weather-resistant fasteners and ensure all connections are properly torqued to manufacturer specifications.
For maximum adjustability, consider incorporating tilt mechanisms into your rail system. This allows you to optimize your panels’ angle seasonally – particularly beneficial in BC’s northern regions where sun angles vary significantly throughout the year. Many local installers recommend a tilt angle between 30-45 degrees, depending on your specific latitude.
Remember to maintain a minimum ground clearance of 45 centimeters to account for snow accumulation and to facilitate maintenance access. This height also helps promote airflow beneath the panels, improving overall system efficiency.
Panel Installation and Wiring
Once your ground mount structure is securely in place, it’s time to install your solar panels and complete the wiring. Begin by carefully lifting each panel onto the mounting rails – this is best done with two people to prevent damage and ensure safety. Secure the panels using the manufacturer-recommended mounting clamps, ensuring even spacing between panels for optimal airflow and maintenance access.
For the wiring process, start by connecting the panels in series or parallel according to your system design. Use UV-resistant solar cable rated for outdoor use, and ensure all connections are made using MC4 connectors designed specifically for solar installations. Install a junction box at the array to house your connections, keeping it weatherproof and easily accessible for future maintenance.
In British Columbia’s climate, it’s crucial to protect all wiring from moisture and wildlife damage. Use proper conduit for any exposed wiring runs, and ensure all penetrations are properly sealed. Install a proper grounding system according to BC Electrical Code requirements, connecting all metal components of the mounting system to your ground rod.
Before making final connections to your inverter, double-check all wiring connections and mounting hardware. Remember that while DIY installation is possible, having a licensed electrician inspect your work and make final grid connections is required by law in BC. This ensures your installation is safe and compliant with local regulations.
Maintenance and Weather Protection
British Columbia’s diverse climate demands careful attention to maintaining your DIY ground-mounted solar system. Regular inspections are essential, particularly before and after extreme weather events. Check the mounting structure quarterly for signs of rust, loose bolts, or soil erosion around the foundation posts.
During our wet coastal winters, ensure proper drainage around the mounting structure to prevent water pooling and potential foundation destabilization. Apply rust-resistant coating annually to metal components, focusing on joints and connection points. For inland areas experiencing heavy snowfall, follow these winter maintenance tips to safely remove snow accumulation and maintain system efficiency.
Consider installing wildlife barriers around the base of your ground mount to prevent small animals from nesting underneath or chewing on wires. A simple mesh fence or gravel border can effectively deter pests while maintaining airflow around the structure.
In regions prone to high winds, such as the Fraser Valley, conduct monthly inspections of support brackets and reinforcement components. Tighten any loose hardware and ensure guy-wires remain properly tensioned. During wildfire season, maintain a clear area around the mount by removing dry vegetation and debris.
Keep detailed maintenance records and schedule seasonal check-ups to address potential issues before they become serious problems. Many BC solar owners find success with a maintenance calendar that aligns with our region’s weather patterns, ensuring their ground-mounted systems remain efficient and secure throughout the year.
Taking on a DIY solar panel ground mount project in British Columbia is an empowering way to contribute to our province’s renewable energy future while potentially saving thousands on installation costs. By following proper planning procedures, adhering to local building codes, and implementing safety measures, you can successfully create a sturdy foundation for your solar array that will serve you for decades to come.
Remember to thoroughly assess your property’s solar potential, obtain necessary permits, and consider seasonal weather patterns when designing your mount system. While the initial investment of time and resources may seem substantial, the long-term benefits of energy independence and reduced carbon emissions make it worthwhile.
We encourage you to connect with local solar communities and experienced installers for additional guidance. Many British Columbians have successfully completed their ground mount installations and are often willing to share their experiences and tips. Whether you’re in Vancouver Island’s mild climate or the more challenging conditions of the Interior, your DIY solar journey can inspire others while contributing to BC’s clean energy goals.
Take that first step today – your sustainable energy future awaits!