Transform your van into a solar-powered adventure machine with a professional-grade DIY solar panel installation that powers your off-grid dreams. British Columbia’s unique climate demands careful planning and precise execution, but with the right approach, you’ll harness clean energy while exploring the province’s breathtaking wilderness.
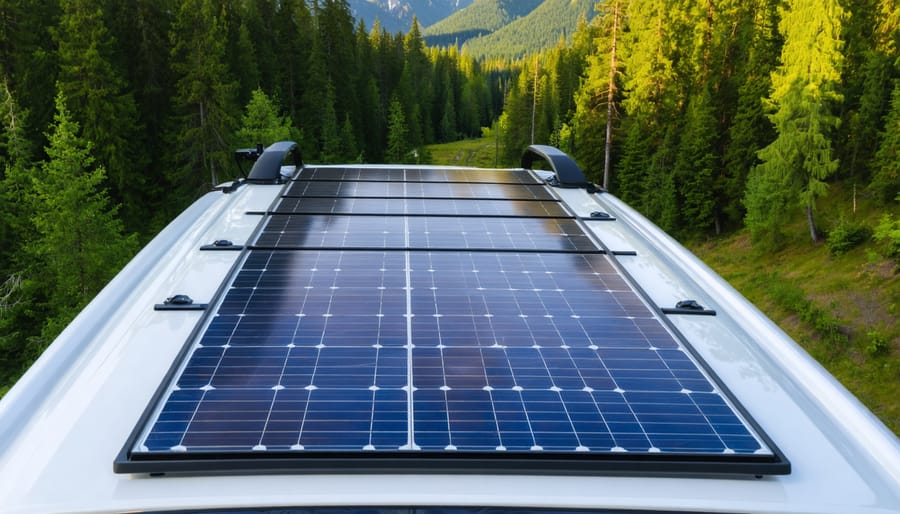
Start by calculating your daily power requirements – from laptop charging to refrigeration – and factor in BC’s seasonal sunlight variations. Select rigid monocrystalline panels for maximum efficiency in our northern latitude, aiming for 200-400 watts per panel depending on your roof space. Mount them using aerodynamic brackets specifically designed for vehicle installations, ensuring they can withstand coastal winds and mountain weather conditions.
Your installation will pay for itself within 2-3 years through fuel savings and increased autonomy, while contributing to BC’s environmental goals. Whether you’re converting a weekend camper or building a full-time mobile home, solar power transforms your van from a simple vehicle into a sustainable living space ready for any adventure.
Planning Your Van’s Solar Setup
Calculating Power Requirements
Before installing solar panels on your van, it’s crucial to accurately determine your power requirements. Start by listing all the electrical devices you plan to use, from essential appliances like a refrigerator to comfort items such as fans or lighting. For each device, note its power consumption in watts and estimate daily usage hours.
To calculate solar panel output needs, multiply each device’s wattage by its daily usage hours. For example, a 40W laptop used for 4 hours daily requires 160 watt-hours per day. Add up all your devices’ watt-hours to determine your total daily energy needs.
Consider seasonal variations in BC’s climate – you’ll likely use more power for heating in winter and cooling in summer. It’s recommended to add a 20% buffer to your calculations to account for system inefficiencies and unexpected power needs.
Here’s a quick reference for common van appliances:
– 12V Refrigerator: 30-60W (720-1440Wh/day)
– LED Lights: 2-5W each (10-25Wh/day)
– Roof Vent Fan: 2-30W (48-720Wh/day)
– Water Pump: 60W (60-180Wh/day)
Remember that power usage patterns may change as you adapt to van life. Start with a conservative estimate and monitor your actual usage during the first few months of operation.
Choosing the Right Components
When building your van’s solar system, selecting components that can withstand BC’s diverse climate is crucial for long-term reliability. For optimal performance in our region’s varying conditions, consider monocrystalline panels, which offer superior efficiency even during overcast days. These panels typically provide 100-200 watts each, and most van builds require 200-400 watts total, depending on your energy needs.
For batteries, lithium iron phosphate (LiFePO4) batteries are increasingly popular for off-grid solar solutions due to their excellent cold-weather performance and longer lifespan compared to traditional lead-acid alternatives. A 100-200Ah battery bank is typically sufficient for most van setups in BC.
Your charge controller acts as the system’s brain, and for BC’s variable weather, an MPPT (Maximum Power Point Tracking) controller is worth the investment. These controllers can increase system efficiency by up to 30% compared to simpler PWM controllers, especially during cloudy conditions common along the coast.
Remember to choose components rated for mobile applications and marine-grade wiring to handle vibration and moisture. Local suppliers often stock components tested in BC conditions, and many offer valuable advice based on regional experience. Consider slightly oversizing your system to account for shorter winter days and frequent cloud cover.
Preparing Your Van’s Roof
Surface Preparation
Before mounting solar panels on your van’s roof, proper surface preparation is crucial for ensuring a secure and long-lasting installation. Start by thoroughly cleaning the roof with an eco-friendly degreaser and warm water to remove any dirt, grime, or oxidation. Pay special attention to areas where the mounting brackets will be placed.
Once clean, dry the surface completely and inspect for any damage, rust spots, or weak points that might compromise the installation. If you find any issues, address them before proceeding. For metal van roofs, lightly sand the mounting areas to create a better surface for adhesion.
Apply a rust inhibitor and protective coating to prevent future corrosion, especially important in BC’s coastal regions where salt air can accelerate rust formation. Mark your mounting points with painter’s tape, ensuring they align with the van’s structural supports underneath.
Finally, apply a self-leveling sealant around any existing roof fixtures or penetrations to prevent water ingress. Let all products cure completely according to manufacturer specifications before moving forward with the installation.
Creating a Mounting Plan
Before mounting solar panels on your van’s roof, carefully plan the layout to maximize efficiency and ensure structural integrity. Start by measuring your roof space and comparing it with standard solar panel dimensions to determine how many panels you can safely accommodate. Consider the location of existing roof features like vents, antennas, and roof racks.
Select mounting points that align with your van’s structural support beams for optimal weight distribution. Most vans have reinforced areas along the roof’s edges and center line, which make ideal mounting locations. In BC’s varied climate, leaving enough space between panels for maintenance and snow removal is crucial.
Create a detailed diagram marking your intended mounting points, and verify they don’t interfere with the van’s existing hardware or compromise weatherproofing. Factor in at least 4-5 inches of clearance between the roof and panels to allow for proper airflow and cooling. Remember to position panels to minimize shade from roof accessories and account for the typical parking orientation at your frequent destinations.
Installation Process
Mounting the Panels
Once you’ve planned your layout, it’s time to mount the panels securely to your van’s roof. Start by thoroughly cleaning the mounting area with isopropyl alcohol to ensure strong adhesion. Apply a generous bead of weatherproof sealant around each mounting bracket location to prevent water ingress.
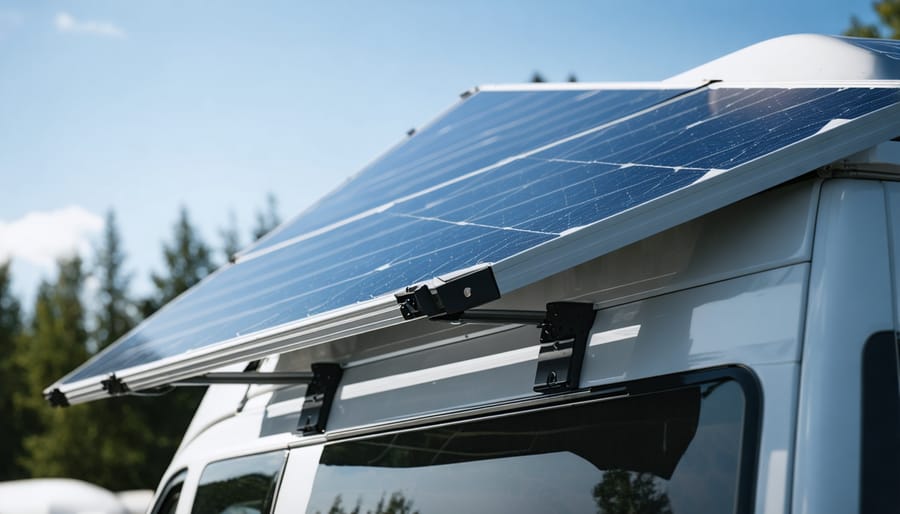
Position your mounting brackets according to your panel layout, ensuring they align with the van’s structural supports. For maximum stability, use stainless steel bolts and lock washers, and apply anti-seize compound to prevent corrosion in BC’s wet climate. If drilling into your roof is necessary, apply rust inhibitor around each hole.
Place your solar panels carefully onto the mounting brackets, ensuring even weight distribution. Most panels come with pre-drilled mounting holes – use these rather than creating new ones. Secure the panels using the manufacturer-provided hardware, but don’t overtighten as this can damage the panel frame.
For BC’s coastal areas, consider additional wind protection by installing edge trim or wind deflectors. Connect the panels using MC4 connectors, ensuring all connections are weathertight. Test each panel’s mounting by gently pushing from different angles – there should be no movement or flexing.
Remember to regularly check your mounting hardware’s tightness, especially after driving on rough terrain or experiencing strong winds. This maintenance helps ensure your panels remain secure throughout BC’s diverse weather conditions.
Wiring and Connection
Proper wiring is crucial for your van’s solar system to function safely and efficiently. Start by connecting your solar panels in series or parallel, depending on your system voltage requirements. For most van setups in BC, a series connection works well, providing higher voltage while maintaining current flow during our occasionally cloudy days.
Run your main solar cables through weatherproof entry ports on your van’s roof, using UV-resistant cable glands to prevent water ingress. These cables should connect to your charge controller, which regulates the power flow to your batteries. Always use properly sized wires – typically 10 or 8 AWG for most van installations – to prevent voltage drop and maintain efficiency.
Install a battery disconnect switch between your charge controller and batteries for safety during maintenance. When connecting to your batteries, use marine-grade cable terminals and protect all connections with heat shrink tubing to prevent corrosion in BC’s wet climate.
For your DC system, create a central distribution panel with appropriate fusing for each circuit. If you’re including an inverter for AC power, mount it close to your batteries to minimize power loss, and ensure proper grounding to your van’s chassis.
Remember to label all wires and create a simple wiring diagram for future reference. Double-check all connections before powering up your system, and consider having a certified electrician review your work for peace of mind.
Installing the Control System
The control system is the brains of your van’s solar setup, and proper installation is crucial for efficient power management. Start by mounting your charge controller in a well-ventilated area, ideally close to your batteries to minimize voltage drop. In BC’s varied climate, a MPPT (Maximum Power Point Tracking) controller is recommended over a PWM controller, as it performs better in our often cloudy conditions.
Connect your charge controller to the batteries first, following the manufacturer’s wiring diagram carefully. This allows the controller to recognize your system’s voltage before connecting the solar panels. Use appropriately sized cables and ensure all connections are tight and properly fused for safety.
Install your battery monitor in an easily visible location, typically near your living space. This helps you track power consumption and battery health at a glance. Many modern controllers come with Bluetooth capabilities, allowing you to monitor your system through a smartphone app.
For BC’s wet climate, consider adding a waterproof housing for your controller if it’s not already rated for moisture resistance. Label all wires clearly and create a simple diagram of your setup for future reference or troubleshooting.
Remember to program your charge controller with the correct battery type and charging parameters. Most lithium batteries require specific settings different from traditional lead-acid batteries. Test all connections and monitoring systems before proceeding with the final panel installation.
BC-Specific Considerations
Weather Protection
British Columbia’s diverse weather patterns require careful consideration when installing solar panels on your van. While solar systems are generally durable, proper weather protection ensures optimal performance in cloudy conditions and extends the life of your investment.
Start by applying a high-quality marine-grade sealant around all mounting brackets and roof penetrations. This creates a waterproof barrier that prevents moisture from seeping into your van during BC’s frequent rainfall. Use UV-resistant cable glands where wires enter the vehicle, and ensure all electrical connections are housed in waterproof junction boxes.
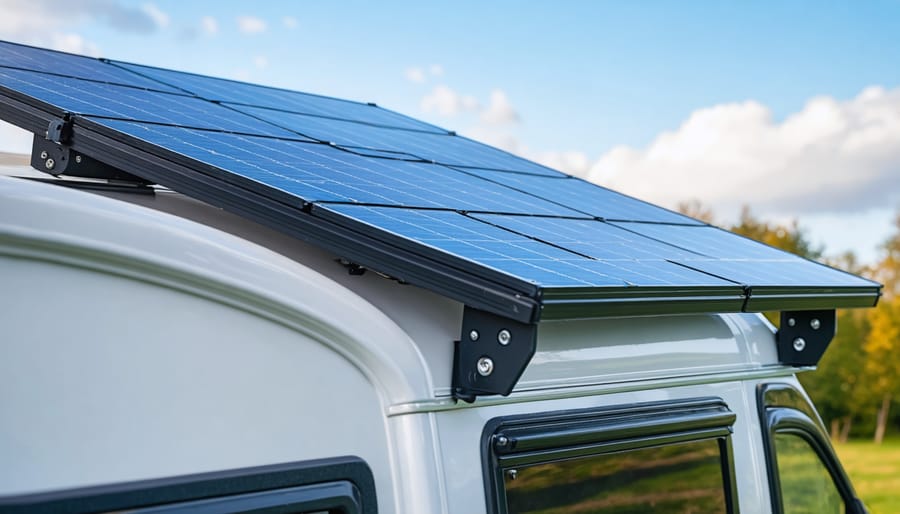
For coastal areas where salt air is a concern, consider using stainless steel mounting hardware and regularly cleaning your panels with fresh water to prevent corrosion. In mountainous regions where snow accumulation is common, install your panels at a minimum 15-degree angle to encourage snow sliding off naturally.
Install a charge controller with temperature compensation features to protect your batteries during extreme weather swings. Additionally, use flexible solar panels with strong adhesive backing for better wind resistance during coastal storms. Consider adding rubber gaskets between mounting brackets and your van’s roof to minimize vibration and prevent water ingress.
Remember to check weather seals and mounting hardware seasonally, especially before winter sets in. This preventive maintenance helps avoid weather-related issues and ensures your system’s reliability throughout BC’s changing seasons.
Local Regulations
Before installing solar panels on your van in British Columbia, it’s essential to understand the local regulations that govern mobile solar installations. Unlike permanent residential installations, mobile solar setups have fewer restrictions, but there are still important considerations to keep in mind.
In BC, vehicles with aftermarket modifications must comply with ICBC safety standards. While solar panels aren’t specifically regulated for vans, they must be securely mounted to prevent becoming a road hazard. Your installation should not interfere with the vehicle’s structural integrity or obstruct your view while driving.
For electrical safety, Transport Canada requires all electrical modifications to meet Canadian Safety Standards. This means using CSA-approved components and ensuring proper fusing and wiring protection. While you don’t need a permit for mobile solar installations in BC, having your system inspected by a certified electrician is recommended.
If you plan to park long-term in provincial parks or campgrounds, check their specific regulations regarding solar panel use. Most BC parks allow solar installations as long as they don’t damage trees or create hazards for other visitors.
For Vancouver residents, the city’s commitment to green initiatives means solar installations are generally welcomed, but parking bylaws still apply. Consider height restrictions for parkades and covered areas when planning your installation.
Remember that insurance coverage may be affected by solar modifications, so consult with ICBC about updating your policy to reflect these changes.
Installing solar panels on your van in British Columbia opens up a world of sustainable adventure and freedom. By following the steps outlined in this guide, you’re not just creating an eco-friendly home on wheels – you’re joining a growing community of conscious travelers who are reducing their carbon footprint while exploring our beautiful province.
Remember that successful solar installation relies on careful planning, proper equipment selection, and attention to detail during mounting and wiring. British Columbia’s varied climate makes it especially important to consider factors like panel orientation, seasonal sunlight variations, and weather protection. While the initial investment may seem significant, the long-term benefits of energy independence and reduced environmental impact make it worthwhile.
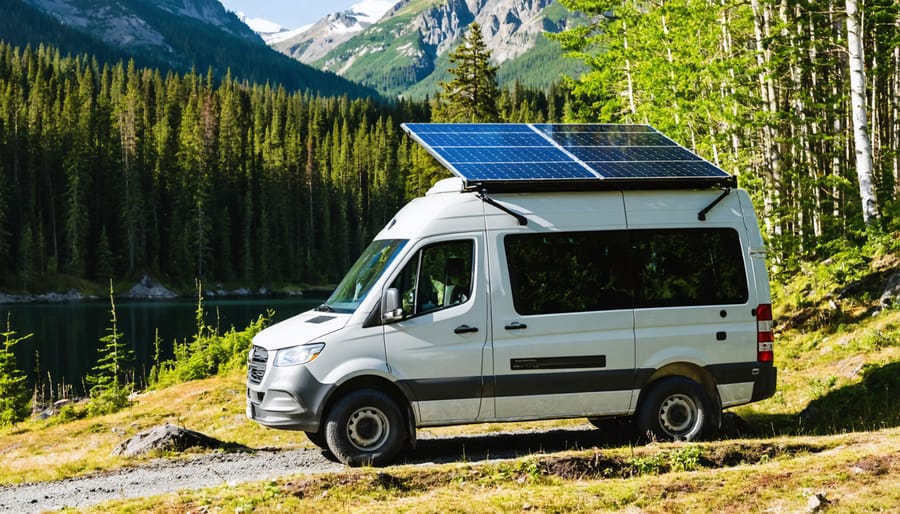
Many van lifers in BC have successfully transitioned to solar power, proving that it’s a viable solution for year-round travel. From the coastal regions to the interior, solar-powered vans are becoming increasingly common at campgrounds and remote locations across the province.
Take advantage of local resources and connect with BC’s vibrant van life community for additional support and advice. As you embark on your solar journey, you’re not just powering your van – you’re contributing to a more sustainable future for British Columbia’s outdoor recreation culture.
Start your solar installation project with confidence, knowing that each properly installed system helps pave the way for cleaner, more sustainable travel options in our province.