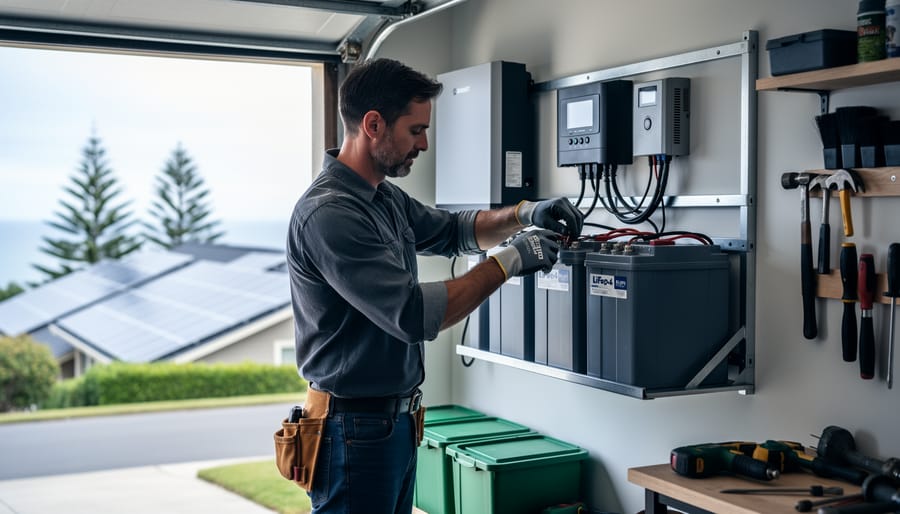
Calculate your daily energy consumption in kilowatt-hours by reviewing three months of BC Hydro bills, then multiply by three to determine your battery bank capacity needs for cloudy periods common in British Columbia’s coastal regions. Select deep-cycle batteries rated for solar applications—lithium iron phosphate (LiFePO4) batteries offer 10-15 year lifespans and 80% depth of discharge, while flooded lead-acid batteries cost less upfront but require monthly maintenance and replacement every 5-7 years.
Size your charge controller to handle 25% more amperage than your solar array’s maximum output, choosing MPPT (Maximum Power Point Tracking) technology for BC’s variable weather conditions where efficiency gains of 20-30% justify the higher cost compared to PWM controllers. Wire batteries in series-parallel configurations using marine-grade cables sized to minimize voltage drop—a 48-volt system reduces current draw and allows smaller, less expensive wiring than 12 or 24-volt setups for homes consuming over 3 kilowatt-hours daily.
Install battery monitoring systems that track state of charge, voltage, and temperature to prevent damage from over-discharge or thermal runaway, especially critical during Interior BC’s temperature swings between summer heat and winter cold. Budget $3,000-$8,000 for a complete DIY battery bank serving a small home, understanding that improper installation voids warranties and creates fire hazards—connection errors cause 40% of residential battery failures.
Verify local building codes through your regional district office before starting, as some BC municipalities require electrical permits and inspections even for DC systems under 750 watts, while grid-tied battery backup systems always need professional certification to meet BC Hydro interconnection standards.
Why Your DIY Solar System Needs a Battery Bank
Grid-Tied with Battery Backup vs. Off-Grid Systems
BC homeowners have two primary options when adding battery storage to their solar setup: grid-tied systems with battery backup or fully off-grid systems. Understanding the differences helps you make the right choice for your property and lifestyle.
Grid-tied systems with battery backup remain connected to BC Hydro’s electrical grid while storing excess solar energy. During outages, your battery automatically kicks in to power essential appliances. This option typically costs $10,000-$15,000 less than going completely off-grid because you need fewer batteries and smaller inverters. You’ll also benefit from BC Hydro’s net metering program, receiving credits for surplus power you generate. This approach works perfectly for most suburban and urban properties where reliable grid access exists.
Off-grid systems completely disconnect from the utility grid, requiring larger battery banks and backup generators for cloudy periods. While initial costs run higher—often $30,000-$50,000 for a complete setup—you gain total energy independence. This makes sense for remote properties where grid connection costs exceed $15,000 or where reliability matters most.
Regulatory considerations differ too. Grid-tied systems require BC Hydro interconnection approval and electrical permits, while off-grid installations face fewer utility-related requirements but demand more careful capacity planning. Rural properties beyond practical grid reach naturally suit off-grid solutions, while connected homes benefit from grid-tied backup’s flexibility and lower costs. Consider your location, budget, and energy independence goals when choosing your path forward.
Real Savings: A Vancouver Island Success Story
When James and Sarah Chen decided to add a battery bank to their existing 6kW solar array in Courtenay, they wanted to reduce their reliance on the grid during evening hours and protect against winter power outages. Their experience offers valuable insights for anyone considering a similar project.
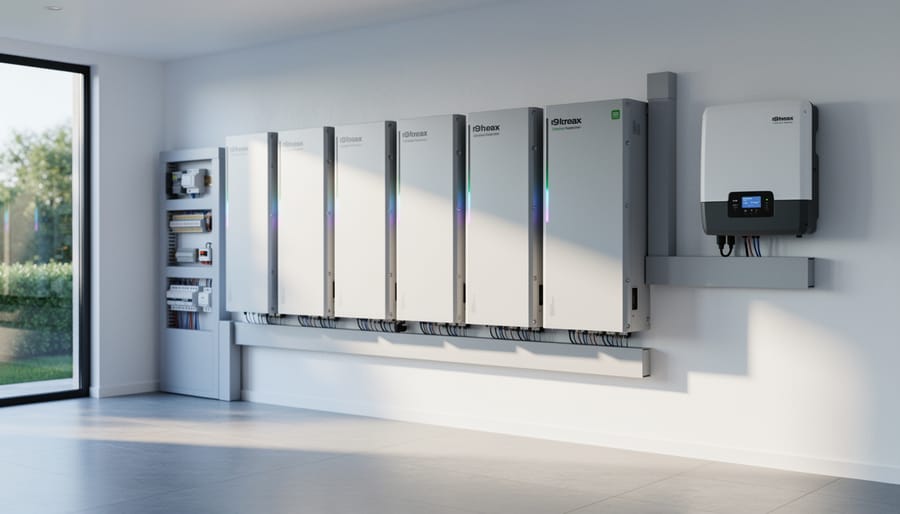
The couple spent two months researching options before settling on a 10kWh lithium iron phosphate battery system. Their total investment came to $7,200, which included four 2.5kWh battery modules, a hybrid inverter, mounting hardware, and all necessary wiring and safety equipment. By choosing to install the system themselves with guidance from a certified electrician for the final connections, they saved approximately $2,500 in installation costs.
The installation took three weekends to complete. James, who has basic electrical knowledge, handled the mounting and initial wiring, while a licensed professional completed the grid connection and final inspection to ensure compliance with BC electrical codes. The most time-consuming part was understanding the battery management system programming, but online tutorials and manufacturer support helped them through it.
After eight months of operation, the Chens are seeing real results. Their evening grid consumption has dropped by 65 percent, translating to savings of roughly $85 monthly on their electricity bills. During a recent winter storm that left neighbours without power for 14 hours, their battery bank kept essential appliances running smoothly.
Sarah notes that proper planning made all the difference. They carefully calculated their evening energy needs, chose quality components with strong warranties, and knew when to call in professional help. Their advice to others: start small if budget is a concern, prioritize safety over savings, and connect with local solar communities for support and guidance throughout your DIY journey.
Choosing the Right Batteries for BC’s Climate
Lithium vs. Lead-Acid: What Works Best in Your Garage
Choosing between lithium and lead-acid batteries for your BC garage comes down to three key factors: climate, maintenance, and budget.
Lead-acid batteries are the traditional choice, with flooded versions costing roughly half the price of lithium upfront. They work well in moderate temperatures but struggle in cold BC winters, losing 20-30% capacity when temperatures drop below freezing. If your garage isn’t heated, you’ll need insulation or heating solutions. Flooded lead-acid batteries also require monthly water top-ups and regular equalization charging, while sealed AGM versions need less hands-on care but cost more.
Lithium batteries, particularly lithium iron phosphate (LiFePO4), handle cold weather better and maintain 80-90% capacity in freezing conditions. They’re maintenance-free, last 10-15 years compared to 3-7 years for lead-acid, and provide more usable energy. While a lithium setup might cost $8,000-12,000 versus $4,000-6,000 for lead-acid, the math shifts over time. One Kelowna homeowner we spoke with replaced lead-acid batteries twice in ten years, spending more overall than if they’d chosen lithium initially.
For BC’s climate, lithium usually makes sense if you’re planning long-term. However, if you’re testing solar storage on a tight budget or have a consistently heated garage, quality lead-acid batteries can serve you well. Calculate your total cost over ten years, including replacements and maintenance time, to see what truly fits your situation.
Calculating Your Storage Capacity Needs
Understanding your storage needs is the foundation of building an effective DIY solar battery bank. The goal is to ensure you have enough backup power during nighttime hours or cloudy days without overspending on unnecessary capacity.
Start by reviewing your household energy consumption. Check your recent electricity bills to find your average daily usage in kilowatt-hours (kWh). Most BC households use between 20-30 kWh per day, though this varies significantly based on home size, heating methods, and lifestyle.
Next, determine how many days of backup power you want. Many homeowners in British Columbia aim for 1-2 days of storage as a practical balance between cost and energy security. This helps cover typical cloudy periods while keeping your system affordable.
Here’s a simple calculation method:
Daily Usage (kWh) × Days of Backup = Base Storage Needed
For example, if your home uses 25 kWh daily and you want 2 days of backup: 25 × 2 = 50 kWh of storage.
However, you should only discharge batteries to 50-80% of their capacity to maximize lifespan (this varies by battery type). For lead-acid batteries discharged to 50%, you’d need 100 kWh of total capacity to access 50 kWh usable. Lithium batteries typically allow 80% depth of discharge, requiring about 62.5 kWh total capacity for the same result.
Consider also identifying your essential loads separately. Many BC homeowners choose to power only critical appliances like refrigerators, heating systems, and lighting during backup situations, which significantly reduces required storage capacity and overall costs.
Essential Components Beyond the Batteries
Charge Controllers: Your Battery’s Best Friend
Think of your charge controller as a traffic cop managing the flow of electricity from your solar panels to your battery bank. Without one, your batteries could overcharge during sunny days or drain completely at night—both scenarios that dramatically shorten battery life. Choosing the right controller protects your investment and keeps your system running smoothly.
You’ll encounter two main types: PWM (Pulse Width Modulation) and MPPT (Maximum Power Point Tracking). PWM controllers are the budget-friendly option, typically costing $50-150. They work well for smaller systems under 1,000 watts where your panel voltage closely matches your battery voltage. Many BC homeowners starting with a basic cabin setup or backup power system find PWM controllers perfectly adequate.
MPPT controllers cost more ($200-600), but they’re worth it for larger systems. They extract up to 30% more power from your panels by efficiently converting excess voltage into additional current. This advantage really shines during BC’s cooler months when panels produce higher voltages. If you’re running a 2,000+ watt system or connecting panels with different voltages, MPPT is your best bet.
For most DIY battery banks in BC homes, we recommend a 40-60 amp MPPT controller. This size handles typical residential arrays (4-8 panels) while leaving room for future expansion. A homeowner in Kelowna recently upgraded from PWM to MPPT and noticed his batteries charging 90 minutes faster on cloudy days—a meaningful difference during winter when every ray counts.
Inverters and Battery Management Systems
Your inverter transforms the DC power stored in your batteries into the AC power your home appliances use. For most DIY battery banks in British Columbia, you’ll choose between two main types: string inverters with battery backup or hybrid inverters that manage both solar panels and batteries simultaneously. A hybrid inverter typically offers better efficiency and simpler installation, making it ideal for residential systems.
Size your inverter based on your peak power needs, not just average consumption. If you’re running a well pump, refrigerator, and heating system simultaneously, calculate their combined wattage and add 25% as a safety margin. For example, a Vernon homeowner with 3,000 watts of essential loads would need at least a 4,000-watt inverter to handle startup surges.
Battery Management Systems (BMS) are your battery bank’s protective guardian. Every quality lithium battery includes a BMS that monitors cell voltage, temperature, and charge rates, preventing the damage that shortens battery life. Think of it as insurance for your investment—a good BMS can extend your battery lifespan by years.
For lead-acid systems, you’ll need a separate charge controller with proper voltage settings to prevent overcharging. Many BC homeowners overlook this component, leading to premature battery failure within two years instead of the expected five to seven.
When selecting these components, verify they’re compatible with each other and rated for BC’s temperature ranges, especially if installing in an unheated space. Local solar professionals can review your component selections before purchase, potentially saving you costly mismatches.
Step-by-Step Installation Process
Safety First: Electrical Precautions You Can’t Skip
Working with battery banks involves serious electrical hazards that demand respect and caution. Before you begin, understand that batteries store significant energy and improper handling can lead to electric shock, chemical burns, or even fire. Always wear safety glasses and insulated gloves when working with batteries, and ensure your workspace is well-ventilated since batteries can emit hydrogen gas during charging.
Here’s what you can safely handle yourself: mounting battery racks, organizing cables with proper labeling, and monitoring system performance once installed. However, leave the actual electrical connections, inverter wiring, and system integration to certified professionals. British Columbia’s electrical codes require licensed electricians for most grid-connected work, and your homeowner’s insurance may require professional installation documentation.
Similar to DIY solar installation, battery bank projects involve knowing your limits. A Surrey homeowner recently shared how they assembled their battery enclosure and prepared all mounting hardware themselves, saving money while hiring an electrician for the final connections. This hybrid approach kept costs reasonable while ensuring safety and code compliance.
Never work on live electrical systems, always disconnect power sources before maintenance, and install appropriate fuses and circuit breakers. Keep a fire extinguisher rated for electrical fires nearby. When in doubt, consult a certified installer. Your safety and your family’s well-being are worth more than any potential savings from cutting corners.
Wiring Your Battery Bank Correctly
Getting your battery bank wiring right is essential for safety and performance. The good news? With careful planning, this is entirely manageable for most DIY enthusiasts in BC.
Understanding series versus parallel connections makes all the difference. Series wiring (connecting positive to negative terminals between batteries) increases your voltage while keeping the same capacity. For example, two 12V batteries in series create a 24V system with the same amp-hour rating. Parallel wiring (connecting all positive terminals together and all negative terminals together) keeps voltage constant but doubles your capacity. Many homeowners combine both methods, creating series strings and then connecting those strings in parallel to achieve their desired voltage and capacity.
Cable sizing isn’t something to guess at. Undersized cables create heat, waste energy, and pose fire risks. For a typical residential setup with batteries close together, use at least 2/0 AWG cable for connections carrying high current. When in doubt, go larger. A local Vancouver Island homeowner recently shared how upgrading to properly sized cables reduced voltage drops by 15 percent, significantly improving their system efficiency.
Making secure connections requires quality components. Use marine-grade battery terminals and apply dielectric grease to prevent corrosion in our damp coastal climate. Torque each connection to manufacturer specifications using a torque wrench. Loose connections cause arcing and heat buildup.
Always install proper fusing or circuit breakers between your battery bank and charge controller. This protects your entire system from shorts or equipment failures. Place fuses as close to the battery positive terminal as possible.
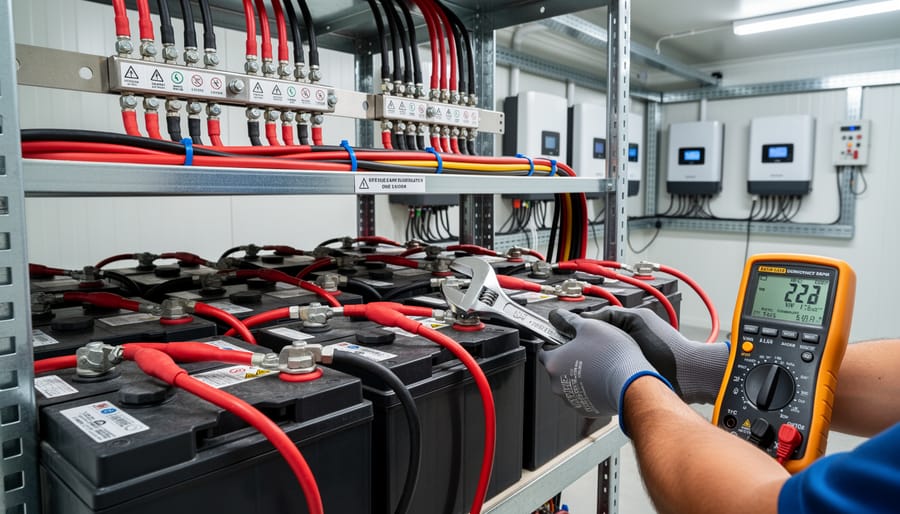
Before energizing your system, double-check all connections with a multimeter. Verify polarity throughout to avoid costly mistakes. Take photos of your wiring configuration for future reference and troubleshooting.
Connecting to Your Solar Panel Array
Connecting your battery bank to your solar panel array requires a charge controller, which acts as the intelligent manager between your panels and batteries. Think of it as a traffic director that prevents overcharging while ensuring your batteries receive optimal power flow.
Start by selecting the right charge controller type. Maximum Power Point Tracking (MPPT) controllers cost more but deliver 20-30% better efficiency, especially valuable during BC’s cloudy winter months. Pulse Width Modulation (PWM) controllers work well for smaller systems under 1,000 watts. A Vernon family recently upgraded to MPPT and noticed their battery bank charged fully even on overcast days, extending their energy independence.
Mount your charge controller on a wall near your battery bank, ensuring proper ventilation. Connect your solar panel array to the controller’s input terminals first, following the manufacturer’s wire sizing recommendations based on your system voltage and distance from panels. Next, connect the controller to your battery bank, respecting polarity to avoid damage. Finally, attach your household loads to the designated output terminals.
Before going live, double-check all connections are tight and properly insulated. Turn on your charge controller and verify it displays accurate voltage readings from both panels and batteries. Monitor the system for several sunny days, checking that batteries reach full charge without triggering overcharge protection.
If voltage readings seem inconsistent or your batteries aren’t charging properly, consult a certified solar professional who understands BC’s specific installation requirements and can ensure your system operates safely and efficiently.

Permits and Regulations in British Columbia
Before you start installing your DIY solar battery bank in British Columbia, understanding local regulations is essential to ensure your system is safe, legal, and eligible for any available incentives.
In BC, any electrical work connected to your home’s power system falls under the BC Electrical Safety Regulation. This means your battery bank installation typically requires an electrical permit from your local municipality or regional district. The good news? This process protects you by ensuring your system meets safety standards and won’t void your home insurance.
Here’s what you need to know: Most jurisdictions require a licensed electrician to perform the final connections between your battery bank and your home’s electrical panel. While you can handle much of the installation yourself—mounting batteries, running low-voltage DC wiring, and setting up charge controllers—the critical AC interconnection work generally needs professional certification.
The permit process usually involves submitting system diagrams, equipment specifications, and proof that components meet Canadian Standards Association approval. After installation, a municipal electrical inspector will review your work before you can legally energize the system. This inspection protects your investment and ensures everything is properly grounded and fused.
Requirements vary significantly across BC municipalities. Vancouver, Victoria, and Kelowna each have specific application processes and fees, typically ranging from 150 to 400 dollars. Rural areas may have different standards, so contact your local building department early in your planning phase.
One Surrey homeowner, James Chen, found the permit process straightforward: “I called the city first, got a checklist, and knew exactly what to expect. The inspector even provided helpful suggestions during the review.”
Start by visiting your municipality’s website or calling their permits department. Ask specifically about energy storage systems and whether they have a simplified process for residential battery installations. Getting this right from the beginning saves time, money, and potential headaches down the road.
Maintenance and Maximizing Battery Lifespan

Monthly Monitoring Checklist
Set aside 30 minutes each month to inspect your battery bank and ensure everything runs smoothly. Start by visually checking all battery terminals and connections for corrosion, which appears as white or blue-green buildup. Clean any corrosion with a baking soda solution and ensure connections remain tight and secure.
Check your battery voltage using a multimeter. For a 12V system, each battery should read between 12.6V and 12.8V when fully charged. Significant voltage differences between batteries may indicate a problem requiring attention.
Examine cables and wiring for signs of wear, fraying, or heat damage. Look for any unusual warmth around connections, which could signal resistance issues. In British Columbia’s coastal climate, moisture can be a concern, so inspect your battery enclosure for water intrusion and ensure proper ventilation.
Review your charge controller display or monitoring app to track daily performance trends. Note any unusual patterns in charging cycles or system efficiency. Many BC homeowners find keeping a simple log helps identify gradual changes before they become serious problems.
Finally, test your battery bank under typical load conditions to confirm it delivers expected runtime. If you notice reduced capacity or irregular performance, document the issue and consider consulting a certified solar professional for assessment.
Cost Breakdown and Available Incentives
How Solar BC Can Help
While a DIY approach can be rewarding, you don’t have to navigate this journey alone. Solar BC connects British Columbians with certified solar installers who can support your project at any stage. Whether you need a professional inspection of your completed DIY installation to ensure it meets safety standards and electrical codes, or you’re looking for expert consultation on the more complex aspects like system sizing and inverter configuration, our network of local professionals is here to help.
Many BC homeowners have found success with a hybrid approach: handling simpler tasks like mounting panels and battery enclosures themselves, while bringing in certified installers for electrical connections and system commissioning. This approach balances cost savings with safety and compliance.
Our certified installers understand local building codes, BC Hydro interconnection requirements, and regional climate considerations. They can also help you access available rebates and incentives. For instance, a Vancouver Island homeowner recently saved 30% on installation costs by doing preliminary work themselves and hiring a professional for final connections and inspection.
Connect with Solar BC today to discuss how we can support your DIY solar battery bank project and ensure your system performs safely and efficiently for years to come.
Building your own DIY solar panel battery bank is entirely achievable with proper planning and a methodical approach. Throughout British Columbia, homeowners and businesses are successfully taking control of their energy future by integrating battery storage into their solar systems. While the process requires careful attention to safety protocols and technical specifications, the long-term benefits of energy independence and cost savings make it a worthwhile investment.
Your first step should always be calculating your energy storage capacity needs. Review your electricity bills, identify your essential loads during outages, and determine how many days of backup power you want. This calculation forms the foundation of your entire project and prevents costly mistakes like undersized systems or unnecessary overspending.
Remember that certain aspects of your installation, particularly electrical connections and grid-tied components, require professional expertise and permits. British Columbia has specific electrical codes and safety standards that must be met. Working with certified installers for these critical stages ensures your system operates safely and maintains any warranty coverage on your equipment.
Solar BC offers valuable resources to support your journey, including calculators to estimate your storage needs and connections to certified professionals who can guide you through complex decisions. Don’t hesitate to reach out for assistance, whether you’re just starting your research or ready to begin installation. The solar community in BC is welcoming and eager to help newcomers succeed with their renewable energy projects.